Monday, April 2, 2012

Everybody has a stock recipe

I know I've been there when we turned chickens into chicken, but I don't remember much beyond the slaughter and the plucking of feathers. I do remember refusing to eat chicken foot anything. I don't care how much it's been boiled or sterilized, I know where those things have been.

I've heard enough good things about bone stock that I decided to try to make it. Over the years I've had mostly failures. It'd be too greasy, it'd have a terrible taste, or it just looked so bad I wanted nothing to do with it.

I broke it down to basics by going with what I know for menudo.(0) It contains at most one animal joint with some meat, hominy, and greasy gritty cattle guts. Since I've been eating it from babyhood, this is normal food. I don't enjoy the tripe, so I just put one big chunk in for the flavor and then dump it when the food is ready to serve.

So, back to the stock. I decided to start small, with a batch of drumsticks. Chicken legs don't have a whole lot of fat, and they have quite a bit of bone and some tasty meat.

I did all the standard things, and had the tools: a skimmer, cheesecloth, a spoon to catch the meat, and a cleaver for the bones. I really, really like marrow.

Taking the skin off was simple and it went well. I finally figured out that the foam that forms while it's boiling is a mixture of blood and fat, so that's why my earlier attempts had failed. I hadn't taken enough of it out. That stuff can be tasty, but not in stock.

Once I got the meat off the bones (and really forks and scissored tongs are the way to go with that). I chopped the big bones in half and tossed them back in the pot.

One neat trick I read was to put in a half cup of lemon juice. This lightens the flavor and the acid leaches more calcium off the bones. Whether that actually makes a nutritionally significant difference, I don't know. I do know that I can taste the difference when I've done it and when I haven't.

After having done that a few times, I mustered up my courage and added a chicken breast for more meat.(1) From there it was a simple step to getting the separate chicken parts, and then finally a whole chicken.

There are some good reasons for cutting up the chicken yourself:

  1. Bone bits - Commercially processed chicken is going to be full of little bone bits that you might or might not catch while digging the cooked meat out off the bones. This can also happen while you're cutting things up, but you're also not likely to be using a huge saw on a deadline while you're doing it.
  2. You get more meat. I was really surprised at this.
  3. Skin and fat for schmaltz and gribenes. (that's a whole other post. Or you can go here)
Other tips that work however you're doing it:
  1. Precut the meat into chunks, while still on the bone. I think the flavor gets in more, and you don't have as much work to do getting it off the bone later.
  2. A timer is essential. You want to cook the meat long enough for it to get flavored, but not so long it's rubbery and tasteless. I usually go for about an hour after the water starts boiling again.
  3. Take the meat's temperature.
  4. Don't be snobby - go ahead and use commercial bouillon to give it a good flavor. This is a great marriage saver.


I have a gallon. Of this stuff. On my stove. Now what?

I use it for lots of things. Most of it goes into the tortilla mix. I generally make tortillas three to four times a week. It takes about two weeks to use up all the stock, so I'll freeze half in a large container and just dip the measuring cup into the other container during the week. It takes about two days for the frozen stock to thaw in the fridge if you don't help it in the microwave.

Other uses are gravy, cheese soup (or really any soup that calls for a can of the soup and a can of water). I've cooked Ramen noodles, pasta, and steamed veggies with it in the microwave.

The really big hit is chicken enchiladas. After frying the tortillas, you'll have about a quarter cup of hot oil left over. Turn off the stove. pour in a half cup of stock, and chili powder to taste. If needed, add some flour to thicken.  It takes about 15 minutes to settle in and mix well. Now you have delicious homemade enchilada sauce.

_____________________________
0. The word "menudo" translates to "small change", or really, "leftovers". More here.
1. January is absolutely the best month to buy chicken. Superbowl Sunday means everyone wants chicken wings, so the rest of the chicken gets sold at ridiculous prices. I got 10 pounds of chicken breast at $.39/lb. If I had a freezer, man...

Friday, July 29, 2011

Salty Sugary Asparagusery

A simple & quick side. It's one of my standbys for all occasions. You can whip these up in 6 minutes from a standing start.

Put 1/2lb asparagus into 1/2 quart boiling salted water for 2-3 minutes until they are bright green. Throw them into the strainer, then put the back in the pot over the same heat. Add 1tbsp soy sauce and 1tsp sugar and roll it all around until you smell the sugar burning / carmelizing. Serve hot with a pat of butter.

What's going on here

Soy is an ancient mix of salt and savory. Caramelized sugar starts to bleed into savory territory as well. Add in the veggie bitter and texture of asparagus and you get a side dish that is surprisingly complex but flexible, equally good with bloody red meat, risotto and boiled chicken.

Frozen Summer Goo


No cooking, not much worry about the right
measurements, have fun tasting as you go.
It’s cold and gooey and tastes like summer.
I had fun inventing it and using up my ripe bananas.
2 large ripe bananas
½ cup un sugared applesauce
½ cup or so, un sugared chocolate powder, any kind you have
2 to 2 ½ cups walnuts
¾ to 1 cup slivered almonds
Sugar replacement of choice (Just like Sugar,
palm sugar, or even brown sugar) taste as you
go for how much to add.
Cut up and smash the bananas in a bowl and add the applesauce. Add the chocolate and mix well. Continue mixing and tasting and add enough sugar replacement to taste good but not too sweet.
After everyone agrees the batter tastes good, add the nuts and mix well.
Use a large cookie sheet lined with wax paper and smear the whole mess all over it until it is only one nut high and looks like peanut brittle would when spread out.
Cover with more wax paper and place in freezer for several hours. Overnight is best, because it’s solid and breaks easily. (It’s solid enough in about an hour.) When removing it, peal off the wax paper from the top and the bottom to break off a chunk. (Don’t EVER try to cut with a knife when frozen solid).
A non- chocolate non- nut variety would be:
Butterscotch bits in stead of chocolate; don’t melt them, just use less applesauce or more bananas.
Cherries cut up instead of walnuts
Teeny tinny marshmallows instead of walnuts
Any dry cereal instead of almonds
Any mints crushed up and sprinked on top after the goo is spread on the tray.
So, lots of ways to make summer goo, and a fun mess. Have fun!

Tuesday, December 1, 2009

Almost Instant Tamales for the Anal-Retentive Lazy Engineer

Tamales were a Christmas tradition in our family. Right along with the tree, the turkey, the ham, and the rosettes. And lots of um, discussions.

What wasn't a tradition was making them. My grandmother made her own enchilada sauce, beans, tortillas, fruit preserves, and grew a chunk of the food we ate, but I don't remember her ever making tamales(0). Every year someone would come around selling his grandmother's tamales. We'd get a good six dozen and be set. Later, when the tortilla/tamale shop opened up, we'd get a box of six dozen.

I remember not finding any decent tamales when I moved to Lubbock. It became my 'thing' to get a box of tamales at the store and pack it in my carry on bag on the trips back to school. I've since found Pedro's to be acceptable, but it was the first time I'd encountered open ended tamales.

So about fifteen years ago I started trying to make my own. This was before the "just look it up" stage of the internet, so I had to find books or packaging that would tell me how to do it. I've still got the recipes that were printed on the corn husk and masa bags in my serendipity book.

Just about everyone else who's blogged or written about making tamales tells you it's a Big Ordeal: it's so labor intensive and involved that you need a crowd of people helping you get it all done. And because it's such a big investment, you'd better damn well make several dozen so 1) there's enough for everyone, and 2) you don't have to do it again for a while. Hence the term "tamalada", which is essentially a tamale making party.

I agree with some of this. If you're going from pig to products in a weekend, then yeah, it's a Job. If you're looking for the taste without a whole lot of hassle, refill your drink and keep reading.

Tamalada for One

The filling The filling can be any damn thing you want. Growing up my parents used to buy "sweet tamales", which were filled with sugared rice and raisins. I couldn't stand them, but my younger siblings sucked them down. (Something they now deny). I was chatting with a coworker about making this year's batch and he mentioned his grandmother's "sweet tamales": pinto beans with brown sugar. I experimented with beans and maple syrup and I may have to kill the man. It's addictive.

Anyway, If you're going to make about a dozen tamales, you'll need about two cups of filling. These things are kind of like small pies or pastries - you'll use up a lot more dough than stuffing. If you find you've run out, find some leftovers and use that.

The dough So the basic recipe tends to be 2 cups masa(not cornmeal), 2 cups warm water or broth, some salt, some baking powder, and 1/2 to 2/3 cup lard. I've used shortening, I've used lard, I've used olive oil. The type of fat doesn't appear to me to affect the taste, but leaving it out altogether does. The cooked dough has a harder time coming away from the husk, and it's drier while eating. Also, fat in the shell blends better with any fat in the filling.

The wrap This is where it gets fun. You can order online, or find in any Mexican store, huge bags of corn husks. The cheaper packages have them all stuffed in willy nilly. More expensive brands have them unfolded and sorted, approximately the same size. Either way, you need to soak the things for a while. The minimum is about an hour(1). The hotter water the better.(2)

Sorting through the husks is time consuming, unless they've been presorted. Even then you're now on the clock - It's time to get that dough spread on the husk and the filling in and it all folded over.

Spoon method: This has you holding the husk in your hand, using the back of a spoon to try and evenly spread the dough over about a four or five inch square. The first few times you try it you will fail. It can be done but takes a lot of practice.

Spreader method: There is a tool that looks like a cement worker's smoother outer that you can get for about $8. This makes the job a little easier by giving your hand even pressure, but this still takes quite a bit of practice.

Press method: Plop a blob of dough on the husk. Fold it over, making a square. Get a spare husk and place it over any exposed dough. Smash with a tortilla press. Try not to smash too hard, as the husk will break and you've lost a husk.

I use what I call a Spreader-Press method: I do the prep I'd do for the press, and use the spreader to smash, and then cut and spread on open spots as needed.

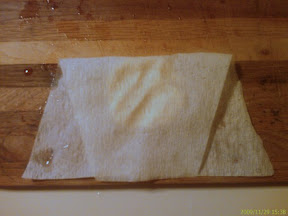
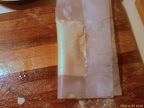
This year I spotted something new - parchment tamale wraps. They look for all the world like corn husks, but completely uniform.

From Tamalada for One

Suddenly life got a lot easier. The wraps were 10 inches long, and wide enough to let me make a 5 inch square with the spreader press method.


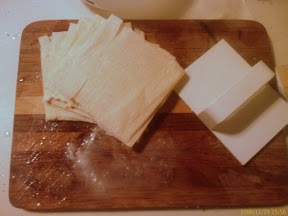
This gave me a nice, uniform stack.

From Tamalada for One


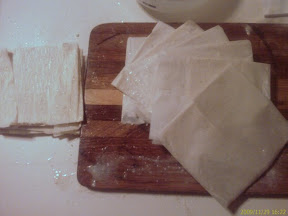
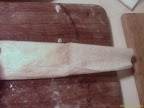
So, having gone from hours of soak'n'sort time to "dip this thing for five seconds to get it wet", I decided to take the next logical step: using plain old parchment paper. Worked like a charm.

From Tamalada for One


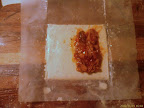
By this time (about an hour and a half. The kids were home and I stopped a lot to take pictures) the leftover pork roast I'd been simmering in enchilada sauce was ready, by which I mean falling apart if you so much as looked at it funny.

Once more unto the dough!


Then to the pot!

From Tamalada for One


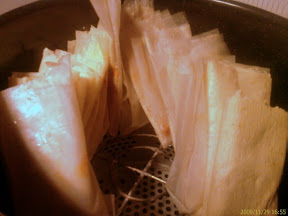
Steam for 90 minutes. I use a lot of water in my tamale pot because I don't like refilling it. This means I need to prop up the floor of the stack with a colander, but I'm not making five dozen at a time, so I don't care. You'll know the tamales are done when the wrapper peels away easily from the cooked dough. The dough should spring back at all points when you poke it with your finger. Any dents and it goes back in the pot.

Dinner!

What's that? Where's the almost instant part? Well, when you have uniform, stackable tamale wraps left over, you can 1) find something else to put in them, or 2) Freeze them!

I had to interrupt a tamalada years ago due to illness. Since the wraps were already made, I put them in the freezer. Then forgot about them. About six months later I ran across them and decided to try it out. They defrosted well, cooked up just fine, and the rest is history.

You still need to do the initial 90 minute steaming. You can break tradition all you want, but physics and chemistry don't care who you are.

For the full set of the tamalada pictures, click the pic.


===================================

0. Dad says that when he was a kid, the tamales were part of a family task where the pig became tamales, chicharrones, ham hocks, chitlin's, bacon, and lard in a weekend.

1. I had good results one year using food dye in the husk's soaking water to color code the tamales by filling. With the colors we could tell right away what was inside.

2. Fortunately they can be stored in the refrigerator in the soaked state for about a week. After that they fall apart.


BONUS!Now this lady has it together!


DOUBLE BONUS! I am not worthy:

Thursday, September 17, 2009

"You want to put WHAT on WHAT?!"

That's the response you're going to get when you propose this for breakfast:

pancakes with fresh feta cheese and honey.

That's what I said, that's what my sister said, that's what everybody else I know said.

But. It tastes great. Granted, you need to actually like feta cheese for this to work. But hey, you don't like it, that's more for me.

Well, I'm lazy. I don't always get the feta, but pancakes are cheap and easy to make. I assuage my mom-nutrition guilt by adding milk powder and an extra egg to the mix so the kids get some protein. (Though when I ran out of eggs and substituted applesauce and brewer's yeast, breakfast was a hit!)

Anyway, I needed to add protein for myself, so I dug out the cream cheese and started making sandwiches out of them. Yum.

But it was lacking the sweet. Enter cream cheese on one side, spreadable honey on the other. Very, very good, and not drippy at all.

Monday, May 25, 2009

easy barbecue sauce

one can enchilada sauce
about half a can of ketchup.

What's going on here?
Shoot, just look at the ingredients.  Then find those obsessive posts about the perfect barbecue sauce. Except for the whiskey and coffee, which should be going into you anyway, there's not a hair's difference.

Sunday, January 4, 2009

It's in the bag

I still do cakes by the cup, mainly because it all gets eaten in one day, so no leftovers to deal with.

Experiments with dried eggs and lethicin granules were a success! I used the Deb-el powdered eggs and granular soy lethicin from my local health nut store.

The original "Cake in a mug" recipe calls for a box of cake mix and a box of pudding to be combined, then split up in approximately one-cup portions. You then add one egg, one tablespoon of water, then one tablespoon of oil for one little cake.

This makes about five cakes total. This means you add the equivalent of five eggs and five tablespoons lethicin to the original cake mix and pudding recipe.

Now your "instant cake" recipe is one cup mix, and two tablespoons water. It comes out pretty thick, so I don't think there's harm in adding a little bit more water if you want to pour easily.

Speaking of pouring: There's really no need to muss up too many dishes making four cupcakes or a single serving cake. Just get a quart sized zipper bag and put the water and mix inside. Smoosh as necessary to mix thouroughly. Cut off a corner to pour the mix into the cupcake papers or little bitty cake pan, or even the coffee mug.

Monday, November 10, 2008

Roast leftovers, part 1

Saturday's dinner was cut up meat and onions in a bowl with some of the juice, soaked up by whole wheat bread. Sunday was meat shavings and Monterrey Jack cheese wrapped in a tortilla.

Monday I got a little ambitious. In my 8" cast iron frypan, I carmelized an onion. Then I put some of the leftover liquid in the pot, along with a spoonful of the rendered fat. (that was a mistake, I think). I dumped the mess into the saucepan.

I read that when you carmelize an onion, you should use a bit of vinegar at the end to deglaze. I say, why use vinegar when you have scotch? About two tablespoons swished around and was dumped into the saucepan.

I cut a potato in thin slices and dumped that in, filling the frypan with water and dumping the water in the saucepan. Simmered until the potatoes were cooked.

I tasted it and it was pretty bland and fatty tasting - next time no fat. I put in generous amounts of celery salt and black pepper, then let it boil some more.

(This is one of those times that roasted long green chiles would have come to the rescue. Alas, they had gone bad)

Tasting again, it wasn't so bad. I spooned some into a bowl with sharp cheddar cheese on top. That turned out to be the key.

What's going on here

I'm thinking the sharp cheddar mitigated the sweetness of the onions, and the fats blended well together.

Lessons Learned
No rendered fat on sweated, carmelized onions, and cut the onions into bits instead of rings for soup.

Saturday, November 8, 2008

One for the cook, one for the cooked

Mom is a master roastmaker. She can make a lump of meat tender and then make it last for a good week. I'm no good at roasts in the oven, but I can do them on the stovetop.

Today I had a beef arm roast and two bottles of beer, a Scottish Ale and Newcastle Ale. Friends told me the "Newkie" would be the best, so it went into the pot and the Scottish Ale went into me.

The roast was frozen when it went into the pan. I'd put some olive oil in the bottom of the big cast iron frypan, along with celery salt, garlic powder, and black pepper.

I seared the top and bottom of the meat and turned down the heat. I cut up half an onion and laid some of the slices on top, and others in the oil.

After about 30 minutes I put in the beer and added the rest of the onion.

What's going on here (shakes fist at baby brother)

(I'm going to cheat and copy from here)

Beer is by nature bitter. It comes from the hops. Malt adds a sweet flavor that counteracts and harmonizes with the bitterness. Likewise, sweet foods profit from the marriage with the hops' bitter taste. Use sugary vegetables like onions, carrots, corn, etc., and even add some honey, molasses or sugar itself. Caramelized onions are a classic example of a sweet vegetable ideal with beer.

***
The result was a very mellow tasting meat and liquid combination. I shaved off some slices off the roast and left them in the liquid. I deglazed the pan with the rest of the Scottish Ale and am letting it all "brew" in the refrigerator. I'm going to get some Russett potatoes during the week and make a potato soup. I'm undecided on whether to add mushrooms.

Wednesday, October 29, 2008

Béchamel Mucho

Serves 2, 5 minutes prep, 20 minutes cooking

More mushrooms! This is a béchamel (BEH-sham-el) sauce good for sea creatures, pastas, poultry or the ocassional bloody steak. Cream sauces take some effort and care but are easy to cook alongside the main dish.

* 1 cup diced fresh brown mushrooms: portabellos, etc
* 1g dried porcini, crushed
* 2tbsp butter
* 12oz whole milk
* 4oz vegetable stock or 1/2tsp soy sauce or 1/2 to 1 cube vegetable boullion
* 1/2 tsp white flour or corn starch
* 1/8 tsp ground black pepper

Warm the milk to about 40C/100F and dissolve the flour and stock/soy/boullion in it. Set aside.

In a medium pot sautee the mushrooms with butter over medium-low heat until they are shrunk to half size and most of the water is gone, about 15 minutes. Add the milk mixture and pepper and raise heat to medium-high, stirring pretty much constantly until it's nice and creamy. Don't let it sit too long.

What's going on here

Bechamel is a "mother sauce" that serves as a base for many many many recipes. The basic ingredients are milk, butter, and flour. Everyone has their own version and origin myths. The only thing they agree on is the need to rinse the pot immediately afterward.

Sauteeing mushrooms slowly releases their flavor better. If you have the time it really brings out their best. You want a nice brown beefy type of mushroom, not a fru fru oyster or those little white ones. The flour/starch should be completely dissolved in the milk so that it acts as a thickener without clumping. Constant stirring when it's in the pot aids evaporation and keeps the milk from boiling and separating. If you can scald milk and clarify butter properly, god bless you. The way I described is easier for us mortals.

You can optionally add a dollop of table cream or heavy cream, or even shredded cheese. The stock/soy/boullion give it salt and extra flavor. For seafood I like to add some shredded ginger on top.

Poor Man's Porcini Pink Sauce

Serves 2, 5 minutes prep, 50 mins cook

* two slices smoked ham or turkey, shredded fine
* pat of butter
* one garlic clove, minced
* one whole boiler/pearl onion, peeled
* one teaspoon dried porcini mushrooms, crushed
* 1/4 teaspoon pepper, salt to taste
* one 8oz can Hunt's tomato sauce or similar; make sure it has no sugar or corn syrup
* 8oz whole milk

Fry meat in hot butter in small pot, until a little crispy. Add garlic & let fry for a minute. Add tomato sauce, pepper, salt, onion, mushrooms and half a can of water. Let boil down, stirring occasionally, until reduced by half. Remove onion. Slowly stir in milk, reduce heat to medium-low, stir until thickened.

Pour over your favorite pasta, top with cheese.

What's going on here

I hate recipes that just tell you to do this and that without the why. This recipe is all about fat and glutamate and "umami", or comfort savory flavors. Each step is designed to release those flavors from the ingredients. The result is very heavy & strong and basically what people mean when they talk about the taste of home cooking.

Frying the meat in hot butter crisps it up and releases some glutamate. You add the garlic for aroma, but don't let it cook more than 1 minute because it burns very easily. Next you want to slowly cook the onion, porcini, pepper, salt and tomato. Tomato sauce is usually sweet and tart and the longer you simmer it the mellower it gets. You leave the onion whole and take it out because once the flavor is leached out the texture adds nothing. Then you slowly add milk and reduce the heat to medium-low. The reason is that milk is fat and protein and sugars suspended in water. If milk gets too hot it separates. You want that fat to mix with the other fats and good stuff.

NB: Dried porcini costs about $15 for 100g (3.5oz) but you only need a few small pieces (1g) for most recipes. It's really worth it.

Wednesday, October 15, 2008

Today we're going to talk about poverty

And by "we", I mean more than eleven thousand bloggers. That's thousands more than most days, so there's a plus.

I've had brushes with low income living, but was never in serious danger of starving. The only time I was functionally homeless was when I was in the process of buying a house. I qualified for free lunches as a child, and one of my college room mates was on food stamps, and that kept us in Ramen. lots of it. And peanut butter.

Welfare deform may have changed welfare as we know it, but it hasn't made life any better for the people who are affected by it daily. And if you think it has no effect on you, well, you'd be wrong.

I've had friends who delayed getting to the doctor because the co-pay was too high or the clinic wasn't open when they were off work. One got sick and ended up in the hospital.

Hunger is not going away, either. My grandmother started a food bank in 1980 - it's still going, and still needs people to help.

People aren't poor because they're lazy. They don't go for government help because they think they're entitled. When we'd visit during the summer we'd help sort clothes for the little thrift store Grandma set up in a closed restaurant. She was asked why she sold the clothes instead of giving them away.

"People don't like handouts," she said. "They want to support themselves, not be the object of pity."

So, no moral to the story, except that even if the poor will always be with us, they still end up being ignored most of the time.

Let's not make this attention just for today.

Friday, May 16, 2008

Cakes In A Jiff

One year for Christmas I gave everybody Cake in a Jar. (Actually I think one person got brownie mix, but still) It was a pretty cool hit. Instant cake! Who doesn't love that?

The basic recipe is cake mix plus a complimentary pudding mix. Once you've got that, any cake is made up of a cup of that mix, an egg, one tablespoon of oil and one tablespoon of water.

That much batter will make about two five inch cakes, or four cupcakes.

There's two ways to cook that - two minutes in the microwave or 20 minutes in the oven. I like the oven method better.

Making it portable and entirely fuss free? I found Deb-el dried eggs, and put the equivalent measure of egg powder in the mix (then add more water when the time comes to cook).

As for oil, I haven't tried hard to find a substitute, but I think dried lethicin granules might do it. Mainly the advantage of the powdered eggs is that I can let the kids lick the bowl without worrying about salmonella.

We've had a lot of fun with differently shaped cupcake cups. "Can we have star cakes, Mom?"

Sunday, May 11, 2008

Berger Beer-Battered Bass

One of the things I dearly loved to do as a teen was visit mom's relatives in Washington state. Grandma and Grandpa had a house on a lake, and during the summer, any kids there had free run of the place as long as the chores were done.

For me that meant fishing and swimming just about every day. One of my most relaxing and cherished memories is me reclining in an innertube (a real one, not these beach-y things they sell these days) in the sun on the lake, about 25 yards from the shore. I'd passed the swim test (swim 200 yards without stopping) and so was allowed to be out beyond the dock. I was too far away from the little kids for them to bug me, but close enough to hurry in if there was trouble. To this day if I'm asked to visualize myself relaxing in some self-help excercise, that's where I go.

As for the fishing, I'd learned the bobber and hook method on trips with dad's side of the family. Now I learned bass hunting: lures, places to fish, how to set the hook, and how to get the bugger off and measure it.

I liked the bass fishing better - I could keep my hands occupied and yet not work very hard and usually could bring a few home for dinner.

We'd usually have beer battered fish when I did bring in a catch. First we'd skin the fish, then fillet. The beer batter would be flour or crackers, with salt and pepper, and whatever beer we happened to be drinking that evening. Dredge the fish planks in the batter and shallow fry on medium heat. The fish was done pretty quickly - once the batter crusted and turned golden brown.

Wednesday, May 7, 2008

My (Almost Perfect) Pinto Beans

One of the regular duties growing up was the making of beans and tortillas. It was my job to hang around and help Grandma with this three times a week.

Tortillas were done with a mix, though she had a recipe handy if we ran out.

Beans were bought dry in bulk, about 5 pounds at a time. She'd take two cups full, dump them in the deepfryer/slowcooker filled with water, throw in half an onion, some salt, and set it to (memory says)400 degrees. The stuff would boil for about and hour and a half, and she'd toss in about a teaspoon of Caldo de sabor de Pollo. Half an hour later the beans were done. Perfect. No spots, no skin peeling off (well, maybe there was) and nothing crunchy.

I've been trying on my own for the last 20 years and it's been a pain. I tried the little one quart crockpots. I've tried big crockpots. I've tried stovetops. Nothing. I had moderate success soaking the beans overnight and discarding the soak water (helps with gas, too).

My sister sent me this link, which has the little trick of boiling then soaking. I put some beans and water in the microwave for 5 minutes, then let it sit for an hour. That helped some.

Nowadays I just use a regular nonstick saucepan with a reasonably tight lid. I soak a cup of beans for at least 8 hours in two cups of water. I rinse the beans and then put them in the pot with 2 or 3 cups of water, depending on the relative humidity. I put in a half teaspoon of salt, a wedge of onion, and bring it to a rolling boil.

Once it's boiling, I reduce the heat to low and put the lid on. This lets it boil again, but not lose the water as fast. About an hour and a half later, I put in the chicken bouillion, and simmer for another half hour.

There's no magic to putting the salt and bouillion in at different times, it's just habit. I've noticed that the beans are saltier if I put the table salt in late, but that's about it.

Saturday, May 3, 2008

Emergency Pizza!

Mostly "emergency pizza" is just a dramatic name. One of the kids wanted pizza, and I had all the fixings, but I didn't feel like mixing dough. I don't mind kneading and rolling and shaping dough, but getting from powder and liquid to the dough lump is a process I dislike. If I can, I have the breadmaker or handmixer do the work.

Anyway, the emergency pizza is a flour tortilla, ketchup, cheese (any kind) and whatever toppings are handy, usually pepperoni. I try to make sure that all of the slices have exactly the same number of pepperoni slices or sausage crumbs or whatever, or I'll hear about it.

The tortilla is what's called "burrito size" in the stores, so it's a good 10 inches across. Ketchup is what the kids prefer, but they're slowly getting used to pizza sauce with actual flavor, as long as the pepperonis are there.

I described all this to a buddy at work, and he said that, technically, I'm making pepperoni quesadillas. I conceded that he had a point.

Until! I went to La Diosa Cellars as part of the First Friday Art Trail. I had the Pizza Barcelona, which was essentially a whole wheat tortilla covered with cheese, chicken, and tomatoes.

So there.

p.s. - frozen individual pepperoni slices are a tempting, heavenly snack. Very very good, and very very bad for you.

Sunday, April 27, 2008

Masa Harina to Biscuit Mix

About 10 years ago I started wondering why you couldn't make biscuits with tortilla mix and vice versa. They both had flour, fat, and baking soda listed as ingredients, so why did I need two mixes?

I looked up substitute recipes and came up with these:


shortening

Biscuit Mix

Tortilla Mix

5c flour /1c shortening

4c flour/2 tbsp lard

9c flour /2c shortening

4c flour/4 tbsp lard

Approx. 20% fat

Approx. 3%-6% fat

Baking powder

5c flour /2½ tbsp powder

4c flour /1tbsp powder

Approx. 5% baking powder

Approx 3% baking powder


So it's all in the proportions. I filed the calculations away, since my curiosity was satisified.

So jump ahead 10 years and I have hungry kidlets, I want cinnamon rolls, and I don't feel like bundling them into the car and driving to the store for something that should be simple to make.

I took a cup of the tortilla mix, and added two tablespoons of butter substitute. This gave me 1oz/8oz = 12.5% fat, plus the maybe 4% already there, for almost 20%.

Next was the baking powder. I put in 1/4 of a teaspoon, which is 1/12 of an ounce, so it's 1/72 of a cup, or 1.4%, adding a smidge to the 3% there.

(It's actually a good idea to mix in the baking powder first, and blend it in. Also a good idea to have the fat you're using softened so that it mixes better)

So you've got an approximation of biscuit mix and you can proceed with whatever recipe you're after.

So far I've only done muffins and cinnamon rolls. Basic rep is the same: add 1/3 cup milk per cup mix and blend until it's a ball.

Here you have to stop if you're using double acting baking powder. The powder reacts with the liquid and therefore needs a little bit of time to rise. Let the lump sit for about five minutes.

For cinnamon rolls, roll an approximate square with a rolling pin. When it's about 3/8 inch thick, you should have a 9"x9" square. Slather on some butter (or substitute) some sugar, and some cinnamon (ok, ok, about a tablespoon of each, or more if you've really got a sweet tooth).

Roll it up and slice. This gets me about 5 little rolls in a 6" springform pan. (They won't fill up the pan raw, so prop them against the edge) I pop the pan into the convection oven at 450˚ for 10-12 minutes.


It wasn't bad. I've done it a few times more since. There's a little jiggering with the baking powder mostly, and I've got to find something better than the springform, because the bottoms don't always cook all the way through.

As always, YMMV.

First Post!

Hi, Mom!